The Machine Paradox 📟
17/10/2023 - 27/10/2023
Nowadays, we're more dependent on machines than ever. For that reason, as designers of the future, we should understand them and their context. During this seminar, we disassembled and changed the way a machine works via open software and fabrication tools.
Understanding the machines
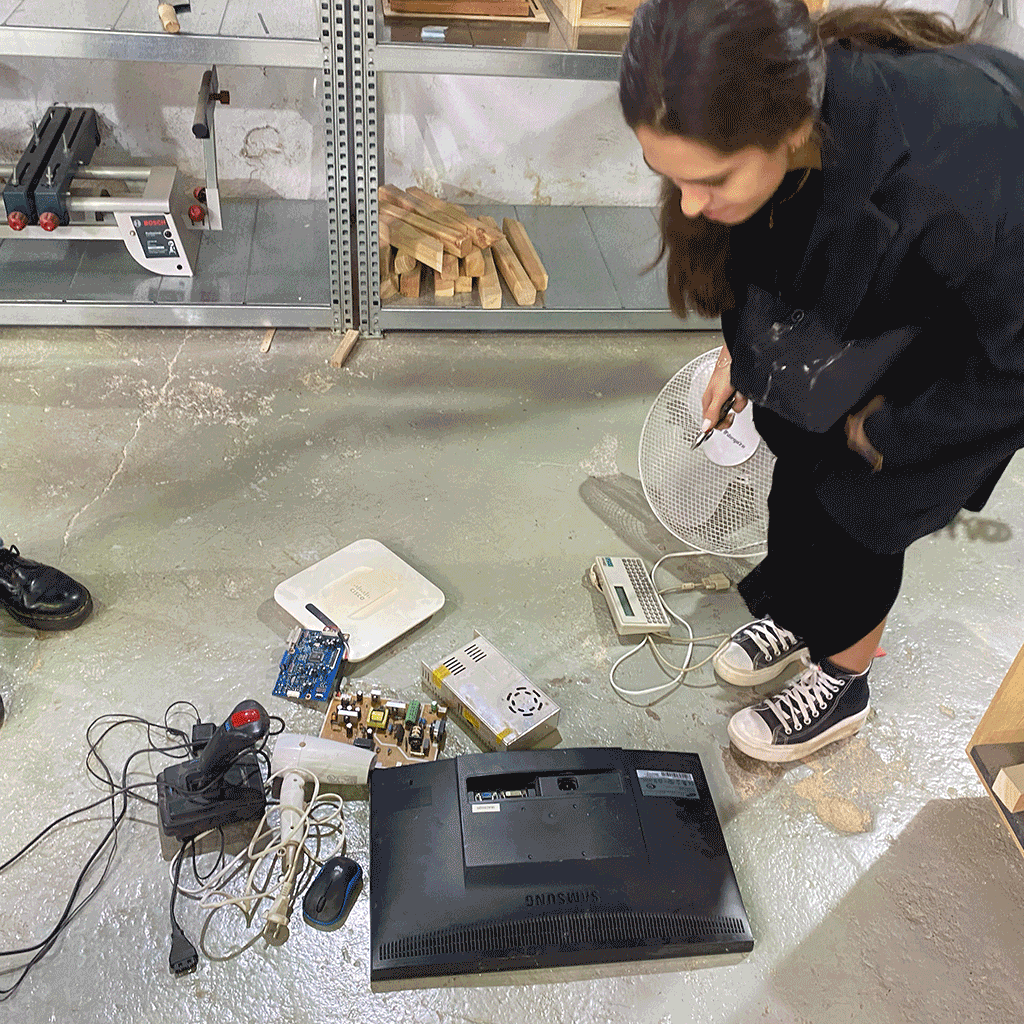
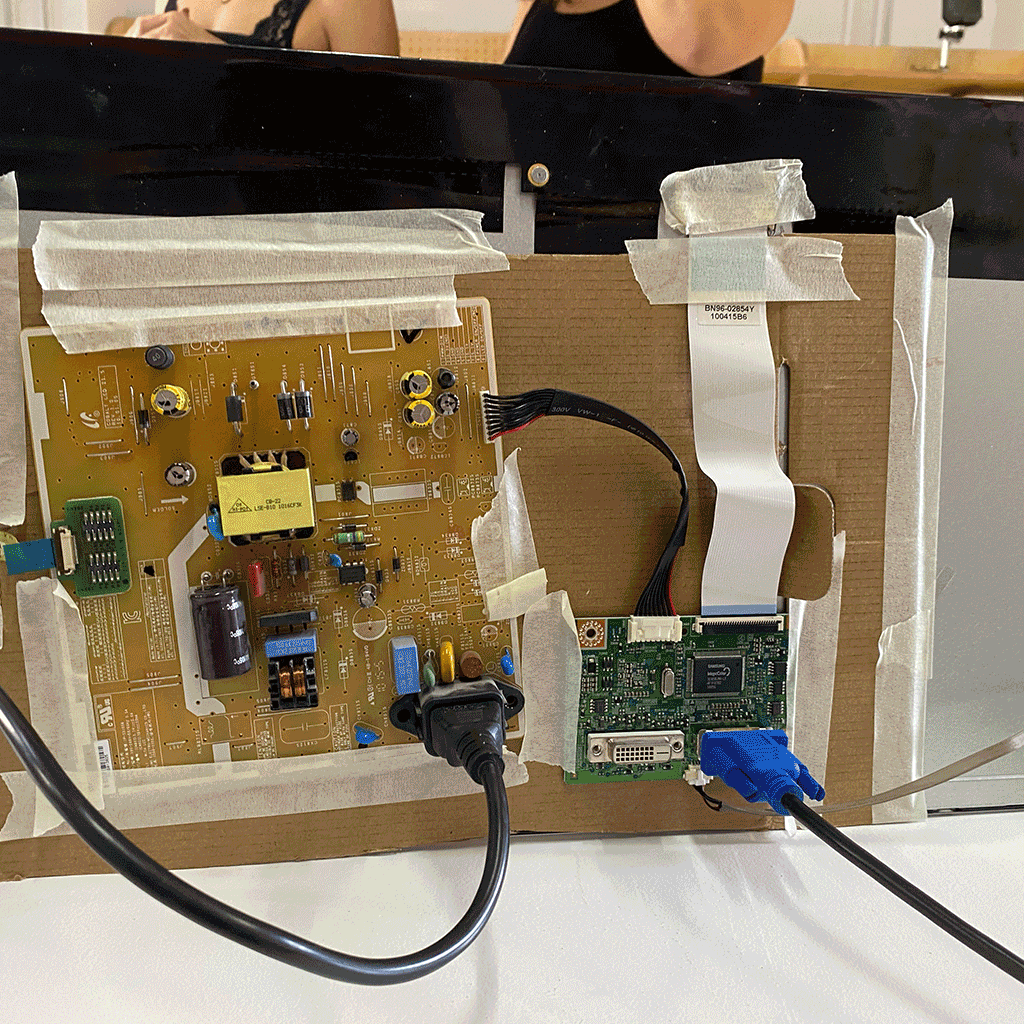
The seminar, started by assembling multidisciplinary teams, where I entered as the fabrication guy because my electronic skills were not that good and the directing and design were not that interesting to me. After assembling the teams, we went to the lab and we needed to pick one of the old and broken machines they had at the Fab Lab. We picked the screen because the technology of the screen itself seemed interesting to us. After this it was time to understand how it worked. For that reason, we completely dissassembled the screen, by doing this we could guess what was the function of each piece and board inside the screen. For this exercise we did a Forensic Report, where we documented all the disassembling process as well as all the information about the product we managed to obtain.
You can check our Forensic Report here 👈
Now, try to assemble it again.
After understanding what each piece did inside the machine, we decided to assemble it again and see if it worked. We managed to turn it on but the screen wasn’t able to read any computer signal when we connected it. After thinking about it, we guessed that some cables were broken. A t this point, considering that this cables were not standardized, we decided to disassemble the screen completely, extracting every layer inside. After doing it, we did some research on the technology used for the screen and how every panel inside worked.
New machine, new problems
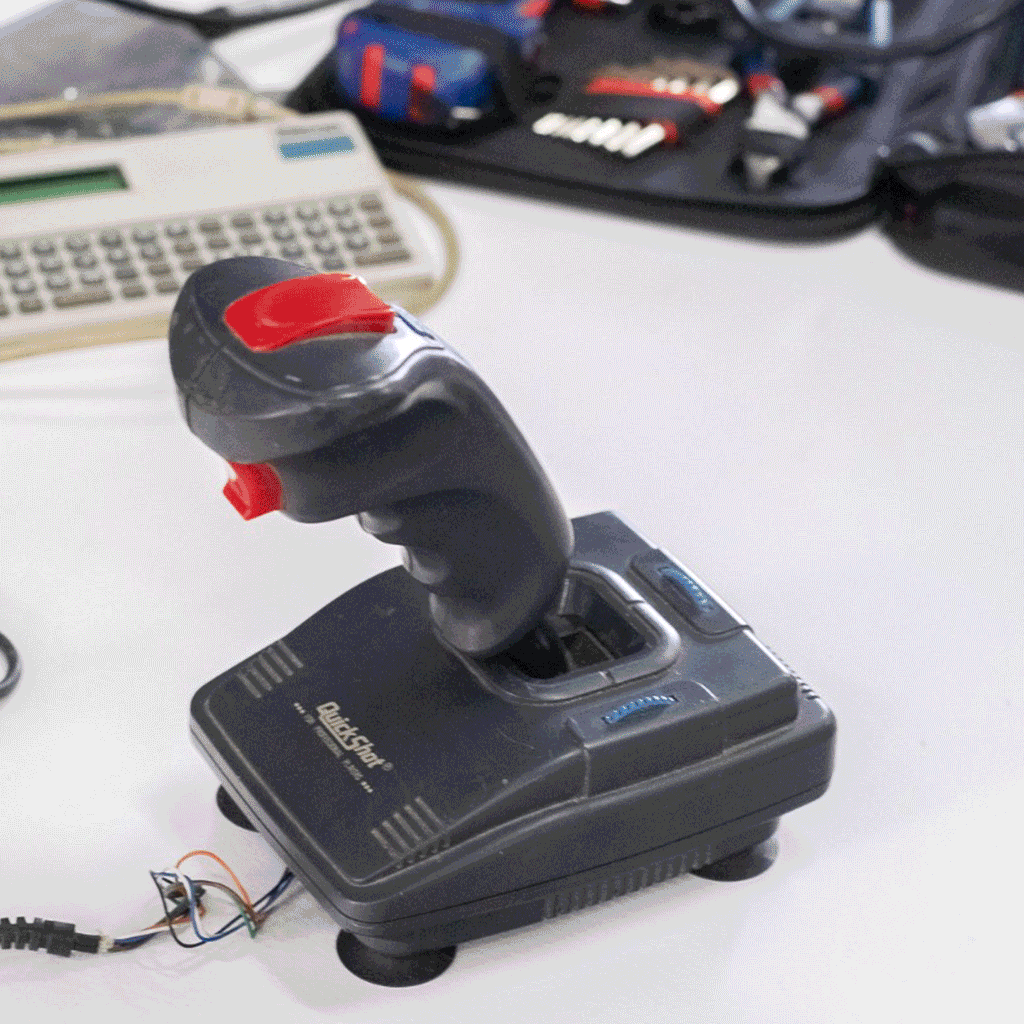
While part of the group was trying to extract and understand the functioning pieces of the screen, the others were redoing the disassembling process with a joystick. We thought it could give us an incredible amount of possibilities. Because of its complexity, the joystick gave us a ton of problems. The sliders were worn out, so the contact wasn’t good, and some of the buttons didn’t make proper contact with the board. Even with this, thanks to an article someone put on the internet, we were able to make the sliders and one of the buttons work. At the end, we didn’t use the joystick in the project, but it was a great learning experience that challenged us.
Designing the machine
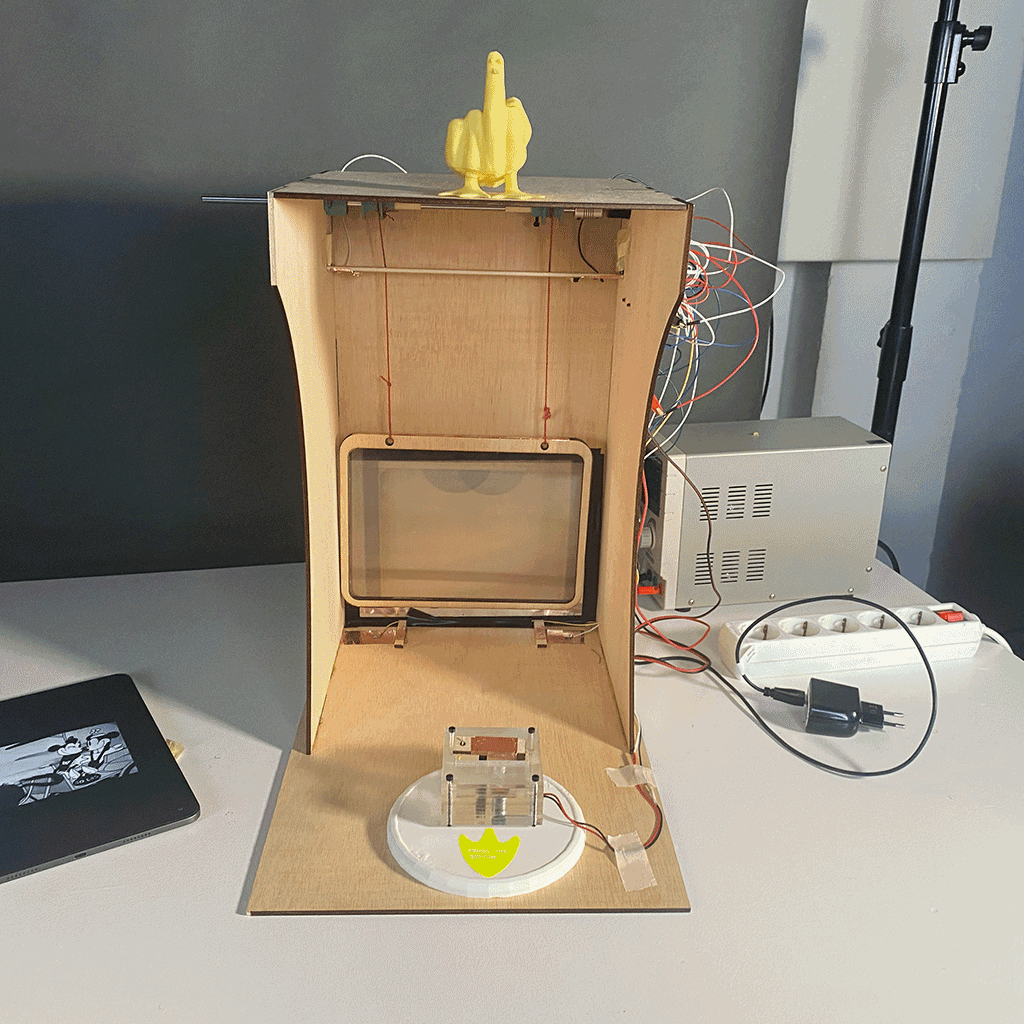
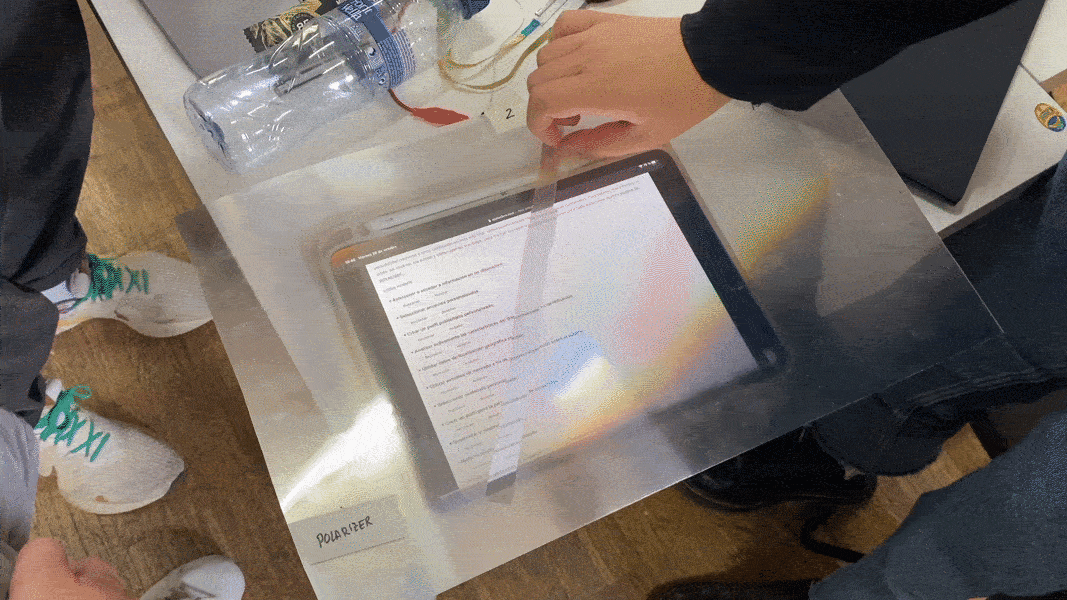
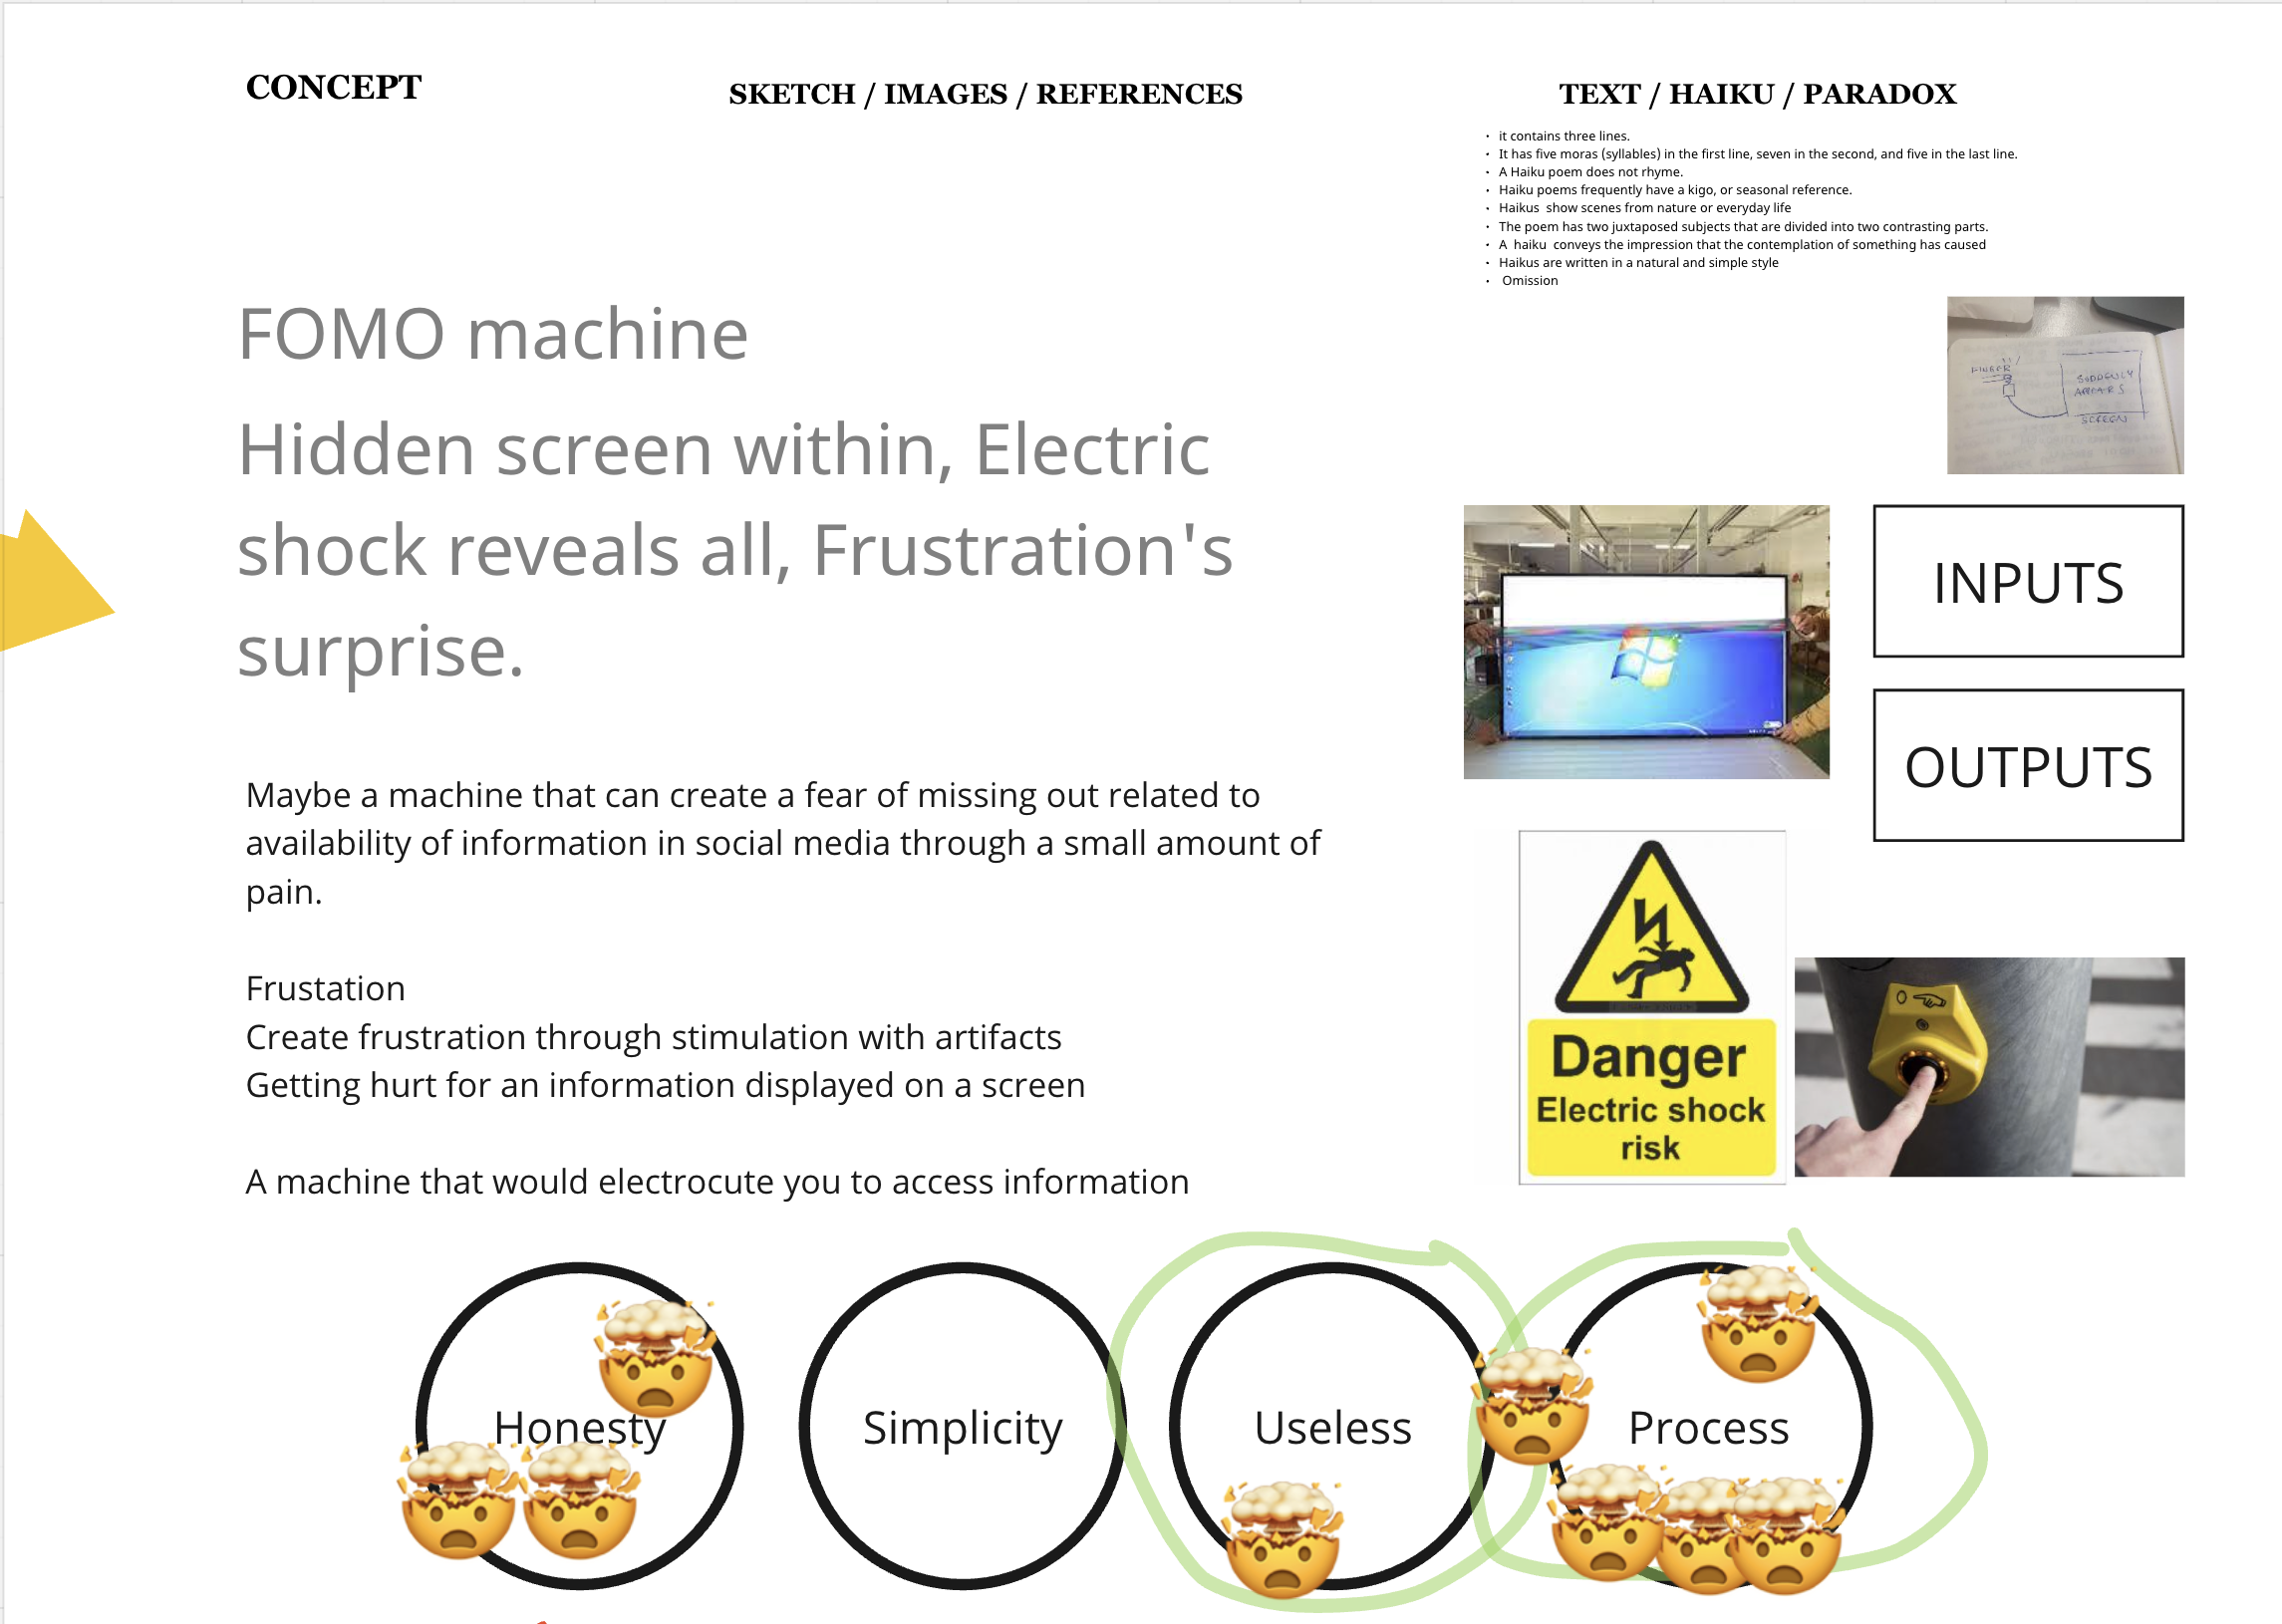
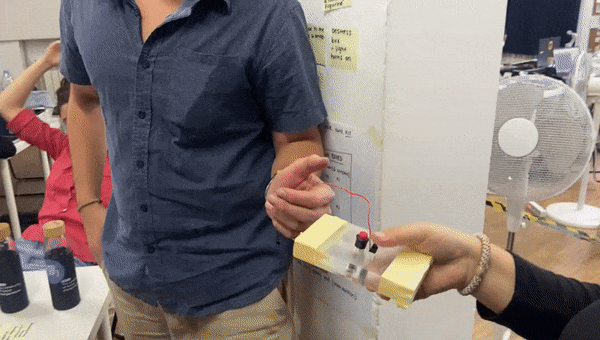
After understanding how the machines work and why ours did not, we needed to design our own “almost useful machine”. In order to do this, we had to figure out our useless function. After pitching different concepts, the rest of the class and the teachers helped us choose the type of machine. We decided it was going to be a FOMO (Fear Of Missing Out) machine. This machine will show and hide a video playing on an iPad by using one of the polarized filters found on the screen. To show or hide the screen, the filter will move in front of the screen and be activated by a button that will give the user electric shocks. That way, the machine will challenge it’s users if they want to watch the screen.
Getting hands on
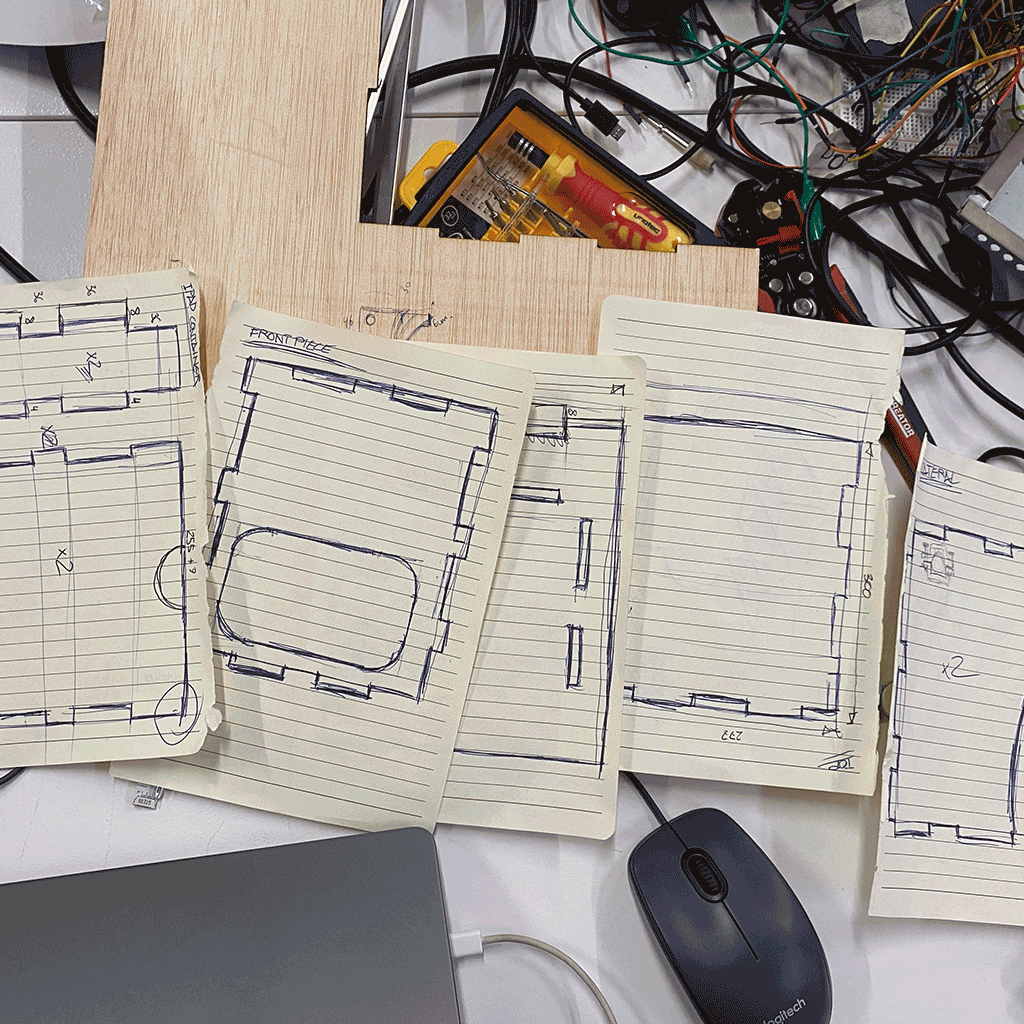
Before starting cutting and printing, we decided it would be best if we did some sketches and a prototype of the machine. That way, we would have a clear vision of what we were doing and understand the proportions of the machine. For that reason, we started building it out of cardboard, following the initial sketch as a reference. Once it looked good, we made some sketches of the plans for each piece. This way, we will have a clear idea of how the pieces work, and it will be easier to draw the pieces in our CAD software.
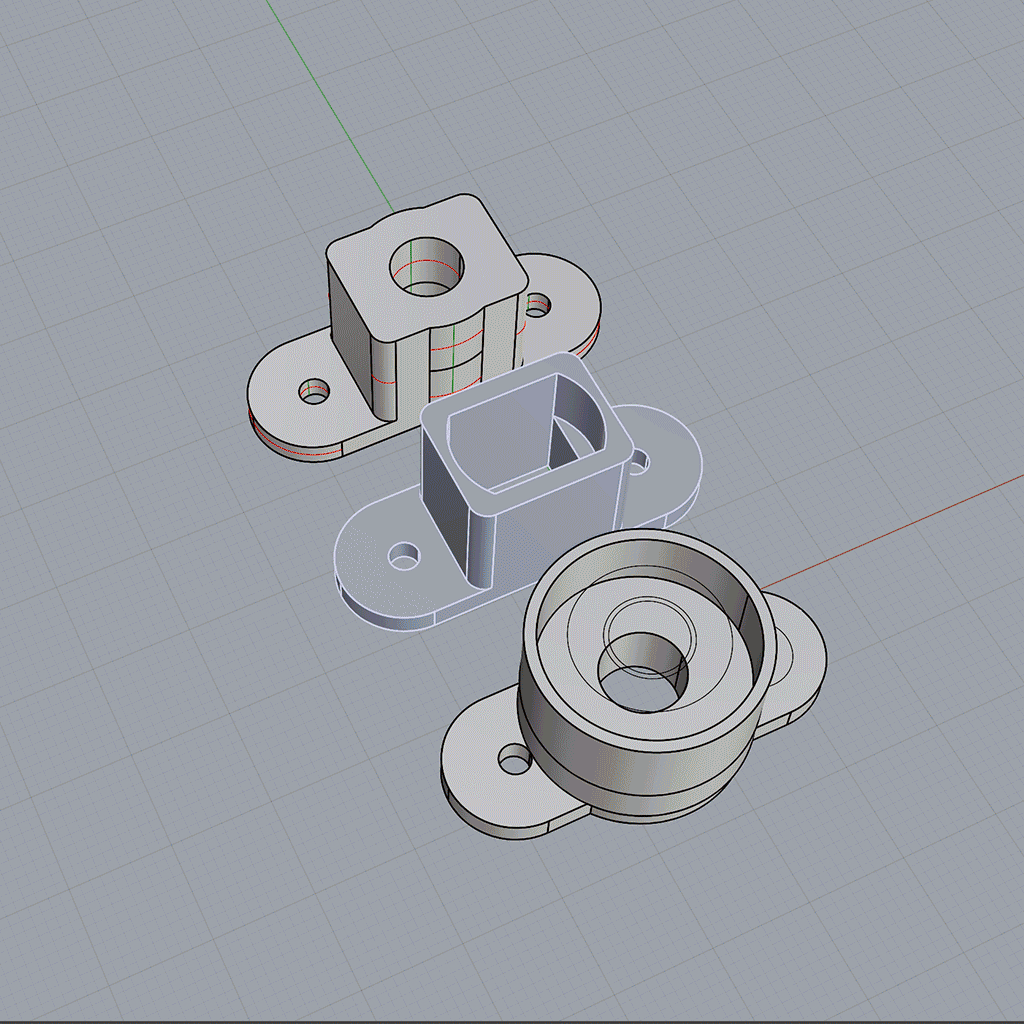
Finally, manufacturing the machine
With proportions and measures clear, we decided to divide in different groups. One started developing the Arduino script for the motor to turn on and of, the other tried to figure out how to make the electric shocks work; and finally, the last one started modeling and manufacturing the pieces for the box. The box consisted of laser cut wood pieces with an edge in the superior part inside that would hold a frame with the filter with cables and get it up and down. What seemed simple ended up being really complicated. First off, we cut a first set of pieces with the laser machine to see if we needed to add tolerances in order to assemble them. After this first test, we managed to assemble them by adding a bit of glue to the sides. So right after we cut the rest of the box pieces, the problem came when we tried to make brackets for the edge and the cables. These brackets will be positioned between the edge and the wood box. We printed different versions because we couldn’t find the exact values of tolerance because the edge needed to rotate while it was held. On our third try, we managed to print the two pieces correctly and were able to assemble the machine. As for the other groups, the electric shock button was made out of the button of a lighter. By disassembling it and taking just that piece, we managed to get the shots. On the other hand, the Arduino script was difficult to achieve. Our idea was for it to go down a bit every time the button was touched, and when it came down, the frame would automatically go up. At the time, we didn’t know how tall the box was, the values were random, and that caused a lot of problems. Also, to know when the frame was in the ground or on top, we needed some end stops, but once we tried to assemble everything, we knew it was difficult to use the ones we had. For that reason, we decided to build our own. With wood and copper tape, we added some at the top, at the bottom and at the frame. By connecting the bottom and top parts to the board, end stops ended up working.
We actually managed to do it!!!!!!
Finalllyyy!!! After a couple obstacles, our machine was finished and fully functioning. This challenge has been hard at times, but so interesting. The fulfillment once we finished filming the video was incredible. I truly feel like I’ve learned a lot of electronics during this course (even though I still feel a bit lost), and I've developed an interest in digital fabrication. I loved this seminar because we were actually the ones using the machine. Unlike my previous studies, I don’t just send the STL file and hope that it’s okay, I go to the lab, slice it and send it to print. This “little” difference just makes this so much more interesting to me. Also, I really loved the idea of the machine not being useful at all. We are so used to everything having a utility in our lives that we just don’t even notice how awesome it is what machines are capable of doing, transforming analog data into digital data and vice versa. Also, not having to do something useful gives us a lot more creativity when facing the project because it doesn’t limit us to the fact that it should be useful. I really enjoyed this seminar, and I can’t wait to do another one like it.